Classic Stripe Bonnet Crochet Pattern: Cozy & Easy-to-Make
Some links in this post are affiliate links, so I may earn a small commission if you make a purchase. It’s a great way to support Crafty Bones, and it doesn’t cost you anything extra! You can find more details in our Privacy Policy.
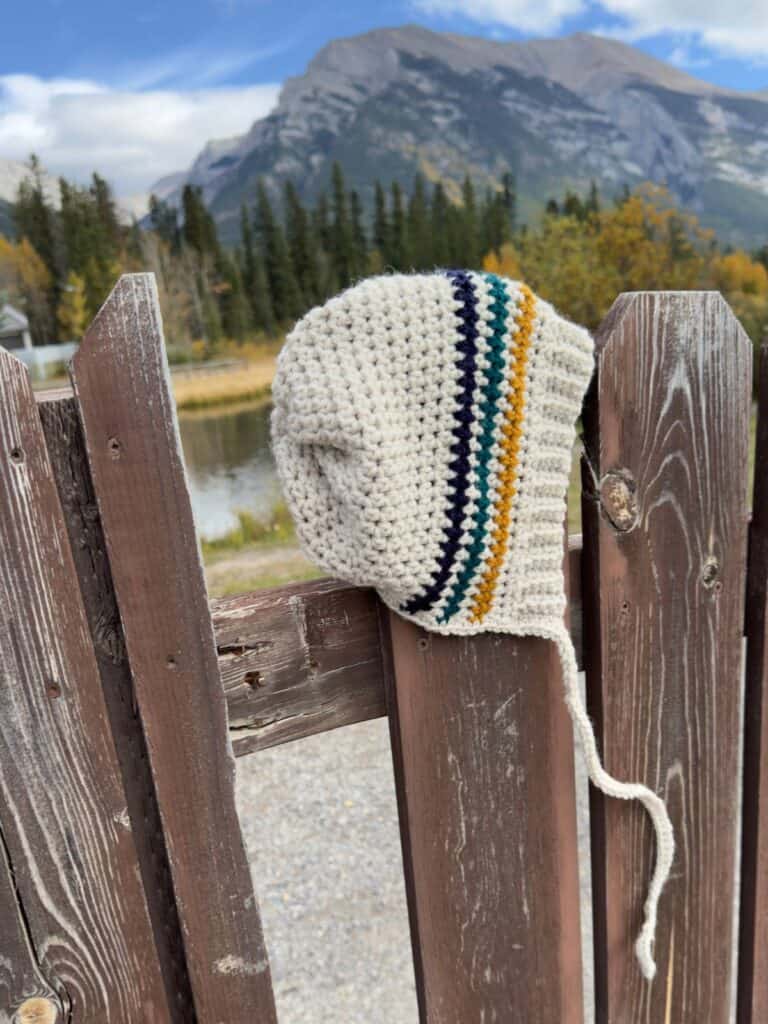
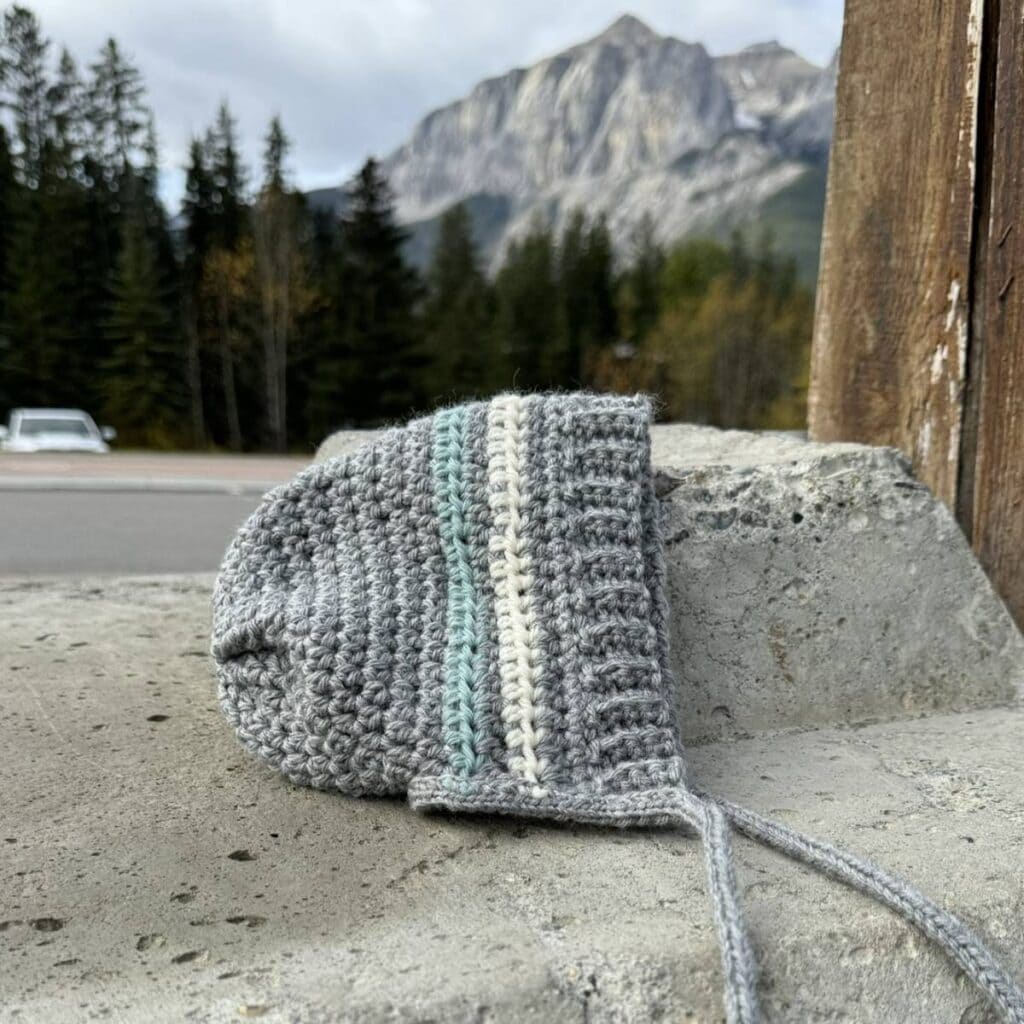
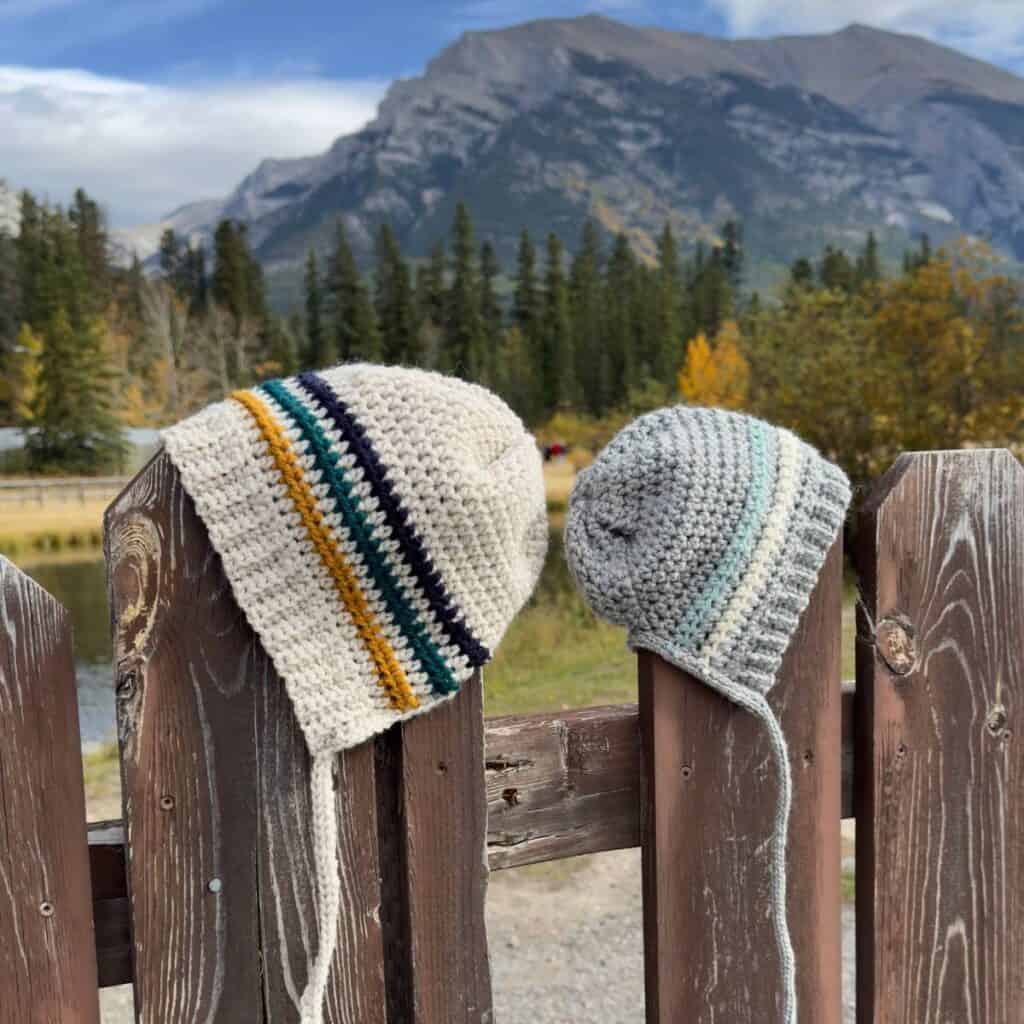
Looking for a cozy, versatile hat pattern? The Classic Stripe Bonnet Crochet Pattern is perfect for kids of any age and can be customized with your choice of colors. This bonnet combines a classic look with a practical design, making it an ideal project for both new and seasoned crocheters.
Tips for making the Classic Stripe Bonnet
To create the crochet bonnet, you will start by making a tube working in rounds, then transition into working in rows, this leaves a portion of the tube open. Next, you will add ribbing along the front of the bonnet. After that you will add the ties and finishing edge to the bottom of the bonnet. Using your choice of crochet I-cord, an i-cord tool, or a foundation single crochet (FSC) to make the ties. Finally, close the tube by cinching up the hole, following the steps outlined in the special stitches to finish your bonnet.
How to Get the Pattern for Classic Stripe Bonnet
- Free Crochet Pattern: Scroll down for the written free pattern with detailed instructions.
- Printable PDF: Ad-free PDF available to download from Ravelry.
Materials Needed for the Crochet Bonnet
What Crochet Stitches do I need to know?
Abbreviations US Terms
fhdc – Foundation Half Double Crochet
fsc – Foundation Single Crochet
scblo – Single Crochet Back Loop Only
sk/skp – Skip/Skipped
st/sts – Stitch/Stitches
More Free Hat/Earwarmer Patterns
Special Stitches needed for this Crochet Pattern
How to crochet a fsc – Foundation Single Crochet
Follow these steps to make a foundation single crochet stitch. Start by chaining 2. Insert your hook into the first chain/2nd chain from the hook. Yarn over and pull up a loop. You should have 2 loops on your hook. First thing we will do is create the chain part of the stitch: To do so Yarn over and pull through only the first loop on the hook. Next we will work the SC part of the stitch: Yarn over and pull through both loops on your hook. To create the second single crochet stitch, yarn over and insert hook into the “chain part of the stitch” (making sure to go through both loops you created in Step 3), Yarn over and pull up a loop. *the chain part of the stitch is the two loops that create a V on the underside of the previous FSC. Yarn over and pull through the first loop on the hook. Yarn over and pull through both loops on hook to complete your next single crochet stitch. Repeat steps 5-7 until you have your desired number of FSC’s.
How to crochet a fhdc – Foundation Half Double Crochet
Follow these steps to make a foundation half double crochet stitch. Start by chaining 2. Yarn over, and then insert your hook into the first chain/2nd chain from the hook. Yarn over and pull up a loop. You should have 3 loops on your hook. First thing we will do is create the chain part of the stitch: To do so Yarn over and pull up through the first loop on the hook. Next we will work the HDC part of the stitch: Yarn over and pull through all 3 loops on your hook. To create the second half double crochet stitch, yarn over and insert hook into the “chain part of the stitch” (making sure to go through both loops you created in Step 3), Yarn over and pull up a loop. *the chain part of the stitch is the two loops that create a V on the underside of the previous FHDC. Yarn over and pull through the first loop on the hook. Yarn over and pull through all 3 loops on hook to complete your next half double crochet stitch. Repeat steps 5-7 until you have your desired number of FHDC’s.
How to create a Crochet I-cord
Follow these steps to make a crochet I-cord. Ch 3, insert your hook into the 2nd ch from hook, yarn over and draw up a loop, insert hook into next ch, yarn over and draw up a loop. You will have 3 loops on your hook. Here is how to make the first row: Step 1: Carefully take the first two loops off the hook and hold them with your non-hook hand so they don’t come undone. Step 2: Yarn over and draw through the loop on the hook. There will be 1 loop on your hook. Step 3: Return one of the loops to the hook. (It will be the closest one to the hook) Step 4: Yarn over and draw through the loop. There will be 2 loops on your hook. Step 5: Return last loop to your hook. Step 6: Yarn over and draw through the loop. There will be 3 loops on your hook. You will continue to repeat steps 1-6 for your desired length of i-cord.
When working the i-cord onto the edge of your crocheting: These will replace step 5 & 6 in making an I-cord row Step 5: After putting the 3rd loop back on your hook, you will insert your hook into the next stitch along the edge of the bonnet. Step 6: Yarn over and draw up the loop through both the bonnet edge AND the 3rd loop on the hook.
How to fasten off: Once you have finished step 6 cut the yarn leaving a long yarn tail. Draw the end through all 3 loops on the hook and pull tight.
How to cinch the tube closed
To close the back of your crochet bonnet: 1. Thread the tapestry needle with the yarn tail from when you made the fhdc. 2. At the outside edge, insert the needle from back to front, catching the “chain” portion of every 3rd or 4th foundation half double crochet (fhdc) stitch around. 3. Using a whip stitch motion, continue around the circle until you reach the beginning. 4. Pull the yarn tight to close the hole. 5. Working across the center, bring the needle through to the opposite side of the circle, creating a crisscross effect. Repeat this action in different directions, forming an “X” or star-like pattern that helps reinforce the closure. 6. Tie off and weave in your end.
How to add on the ties for the Bonnet
There are two options for the type of ties you can make for the Classic Stripe Bonnet. Pick between using an I-Cord tie or a FSC tie(Foundation Single Crochet).
Using I-Cord Tie
Feel free to use any hook size that suits your preference, I used a 3.25mm (D/3) hook.
First, create the specified length of I-cord using a crochet I-cord technique or an I-cord tool. Attach this to the left side of the bonnet, beginning at the bottom edge of the trim, and continue stitching the I-cord around the bonnet’s lower edge until reaching the opposite side. Once you’ve circled the bottom edge, crochet an additional I-cord for the second tie, completing the bonnet’s ties symmetrically. Weave in any remaining ends.
Length of the I-Cord on each side:
Preemie – 11.5 inch (29 cm)
Newborn – 12 inch (30 cm)
6 Month – 12 inch (30 cm)
12 Month – 12.5 inch (31 cm)
Child – 13 inch (32.5 cm)
Teen – 14 inch (35 cm)
Using FSC Tie
Using the 5.00mm (H) Hook Size.
To create the bonnet ties using foundation single crochet (fsc) and single crochet (sc) along the edge. Start with the specified length of fsc for the size you are making. Attach it to the left side of the bonnet at the edge of the trim and work single crochet stitches evenly around the bottom edge. When you reach the other side, crochet another section of fsc the same length to form the second tie, giving the bonnet a secure and finished edge with matching ties on both sides. Weave in any remaining ends.
Length of the FSC on each side:
Preemie – 11.5 inch (29 cm)
Newborn – 12 inch (30 cm)
6 Month – 12 inch (30 cm)
12 Month – 12.5 inch (31 cm)
Child – 13 inch (32.5 cm)
Teen – 14 inch (35 cm)
What is the gauge needed for this Pattern?
In order to achieve the gauge you may need to size up or down on your crochet hook. If you tend to crochet on the tighter side you would go up a hook size, and if you crochet on the looser side you may need to size down a hook size.
HDC & 6.00mm (J) Rows or Rounds
4″ (10cm) square = 9 rows x 12 sts
Get the ad-free PDF of the Classic Stripe Bonnet pattern on Ravelry
Discover the joy of crochet with Crafty Bones.
Preemie Size pattern
Note: The turning chain does NOT count as the first stitch in the row.
6.00mm (J) crochet hook
Round 1: Fhdc 36, sl st to first fhdc to join. (leave your yarn tail long enough to use when cinching up the tube to close the back of the bonnet)
Round 2-7: Ch 2, hdc 36, sl st to first hdc to join.
You will now change from working round to working rows back and forth.
Row 8-11: Ch 2, hdc 36, turn.
Row 12: Ch 2, 2 hdc in first st, 2 hdc in next st, hdc 32, 2 hdc in next st, 2 hdc in last st, turn. 40sts
To add the colour accents you will change the colour for rows 9 & 11 to create 2 stripes.
Change to 5.00mm (H) hook size
Edge row: Ch 1, sc 40 across.
Row 1: Ch 6, sc into 2nd ch from hook, sc in the next 3 chs, sk ch, sl st to 1st sc along the edge, sl st to next sc along the edge, turn.
Row 2: Scblo into 4 sc from previous row, turn.
Row 3: Ch 1, scblo in first st, scblo in next 3 sts, sl st to next sc along the edge, sl st to next sc along edge, turn.
Repeat row 2 & 3 across the edge. Tie off.
Add on the ties by follow the instructions for the I-cord or crochet ties.
To finish up the Bonnet you will want to cinch in the back using this method.
Newborn Size pattern
Note: The turning chain does NOT count as the first stitch in the row.
6.00mm (J) crochet hook
Round 1: Fhdc 42, sl st to first fhdc to join. (leave your yarn tail long enough to use when cinching up the tube to close the back of the bonnet)
Round 2-8: Ch 2, hdc 42, sl st to first hdc to join.
You will now change from working round to working rows back and forth.
Row 9-12: Ch 2, hdc 42, turn.
Row 13: Ch 2, 2 hdc in first st, 2 hdc in next st, hdc 38, 2 hdc in next st, 2 hdc in last st, turn. 46sts
To add the colour accents you will change the colour for rows 10 & 12 to create 2 stripes.
Change to 5.00mm (H) hook size
Edge row: Ch 1, sc 46 across.
Row 1: Ch 6, sc into 2nd ch from hook, sc in the next 3 chs, sk ch, sl st to 1st sc along the edge, sl st to next sc along the edge, turn.
Row 2: Scblo into 4 sc from previous row, turn.
Row 3: Ch 1, scblo in first st, scblo in next 3 sts, sl st to next sc along the edge, sl st to next sc along edge, turn.
Repeat row 2 & 3 across the edge. Tie off.
Add on the ties by follow the instructions for the I-cord or crochet ties.
To finish up the Bonnet you will want to cinch in the back using this method.
6 Month Size Pattern
Note: The turning chain does NOT count as the first stitch in the row.
6.00mm (J) crochet hook
Round 1: Fhdc 48, sl st to first fhdc to join. (leave your yarn tail long enough to use when cinching up the tube to close the back of the bonnet)
Round 2-9: Ch 2, hdc 48, sl st to first hdc to join.
You will now change from working round to working rows back and forth.
Row 10-14: Ch 2, hdc 48, turn.
Row 15: Ch 2, 2 hdc in first st, 2 hdc in next st, hdc 44, 2 hdc in next st, 2 hdc in last st, turn. 52sts
To add the colour accents you will change the colour for rows 11, 13 & 15 to create 3 stripes.
Change to 5.00mm (H) hook size
Edge row: Ch 1, sc 52 across.
Row 1: Ch 7, sc into 2nd ch from hook, sc in the next 4 chs, sk ch, sl st to 1st sc along the edge, sl st to next sc along the edge, turn.
Row 2: Scblo into 5 sc from previous row, turn.
Row 3: Ch 1, scblo in first st, scblo in next 4 sts, sl st to next sc along the edge, sl st to next sc along edge, turn.
Repeat row 2 & 3 across the edge. Tie off.
Add on the ties by follow the instructions for the I-cord or crochet ties.
To finish up the Bonnet you will want to cinch in the back using this method.
12 Month Size Pattern
Note: The turning chain does NOT count as the first stitch in the row.
6.00mm (J) crochet hook
Round 1: Fhdc 54, sl st to first fhdc to join. (leave your yarn tail long enough to use when cinching up the tube to close the back of the bonnet)
Round 2-10: Ch 2, hdc 54, sl st to first hdc to join.
You will now change from working round to working rows back and forth.
Row 11-16: Ch 2, hdc 54, turn.
Row 17: Ch 2, 2 hdc in first st, 2 hdc in next st, hdc 50, 2 hdc in next st, 2 hdc in last st, turn. 58sts
To add the colour accents you will change the colour for rows 12, 14 & 16 to create 3 stripes.
Change to 5.00mm (H) hook size
Edge row: Ch 1, sc 58 across.
Row 1: Ch 7, sc into 2nd ch from hook, sc in the next 4 chs, sk ch, sl st to 1st sc along the edge, sl st to next sc along the edge, turn.
Row 2: Scblo into 5 sc from previous row, turn.
Row 3: Ch 1, scblo in first st, scblo in next 4 sts, sl st to next sc along the edge, sl st to next sc along edge, turn.
Repeat row 2 & 3 across the edge. Tie off.
Add on the ties by follow the instructions for the I-cord or crochet ties.
To finish up the Bonnet you will want to cinch in the back using this method.
Child Size Pattern
Note: The turning chain does NOT count as the first stitch in the row.
6.00mm (J) crochet hook
Round 1: Fhdc 60, sl st to first fhdc to join. (leave your yarn tail long enough to use when cinching up the tube to close the back of the bonnet)
Round 2-11: Ch 2, hdc 60, sl st to first hdc to join.
You will now change from working round to working rows back and forth.
Row 12-18: Ch 2, hdc 60, turn.
Row 19: Ch 2, 2 hdc in first st, 2 hdc in next st, hdc 56, 2 hdc in next st, 2 hdc in last st, turn. 64sts
To add the colour accents you will change the colour for rows 13, 15, 17 & 19 to create 4 stripes.
Change to 5.00mm (H) hook size
Edge row: Ch 1, sc 64 across.
Row 1: Ch 8, sc into 2nd ch from hook, sc in the next 5 chs, sk ch, sl st to 1st sc along the edge, sl st to next sc along the edge, turn.
Row 2: Scblo into 6 sc from previous row, turn.
Row 3: Ch 1, scblo in first st, scblo in next 5 sts, sl st to next sc along the edge, sl st to next sc along edge, turn.
Repeat row 2 & 3 across the edge. Tie off.
Add on the ties by follow the instructions for the I-cord or crochet ties.
To finish up the Bonnet you will want to cinch in the back using this method.
Teen Size Pattern
Note: The turning chain does NOT count as the first stitch in the row.
6.00mm (J) crochet hook
Round 1: Fhdc 66, sl st to first fhdc to join. (leave your yarn tail long enough to use when cinching up the tube to close the back of the bonnet)
Round 2-12: Ch 2, hdc 66, sl st to first hdc to join.
You will now change from working round to working rows back and forth.
Row 13-20: Ch 2, hdc 66, turn.
Row 21: Ch 2, 2 hdc in first st, 2 hdc in next st, hdc 62, 2 hdc in next st, 2 hdc in last st, turn. 70sts
To add the colour accents you will change the colour for rows 14, 16, 18 & 20 to create 4 stripes.
Change to 5.00mm (H) hook size
Edge row: Ch 1, sc 70 across.
Row 1: Ch 9, sc into 2nd ch from hook, sc in the next 6 chs, sk ch, sl st to 1st sc along the edge, sl st to next sc along the edge, turn.
Row 2: Scblo into 7 sc from previous row, turn.
Row 3: Ch 1, scblo in first st, scblo in next 6 sts, sl st to next sc along the edge, sl st to next sc along edge, turn.
Repeat row 2 & 3 across the edge. Tie off.
Add on the ties by follow the instructions for the I-cord or crochet ties.
To finish up the Bonnet you will want to cinch in the back using this method.
Customizing Your Classic Stripe Bonnet
Have fun with chosing your yarn fiber and colours for the Classic Stripe Bonnet.
This is an original pattern by Crafty Bones ©2024. Distribution of this document in whole or in part in any way is not allowed. You may sell finished work with this pattern but please kindly include pattern credit to Leanna Haughian of Crafty Bones or link back to Crafty-Bones.com
Feel free to tag me in any work on social media @Crafty.Bones or use the hashtags #makewithCraftyBones

