Some links in this post are affiliate links, so I may earn a small commission if you make a purchase. It’s a great way to support Crafty Bones, and it doesn’t cost you anything extra! You can find more details in our Privacy Policy.
Looking for a stylish yet functional crochet ear warmer to keep you warm this winter?
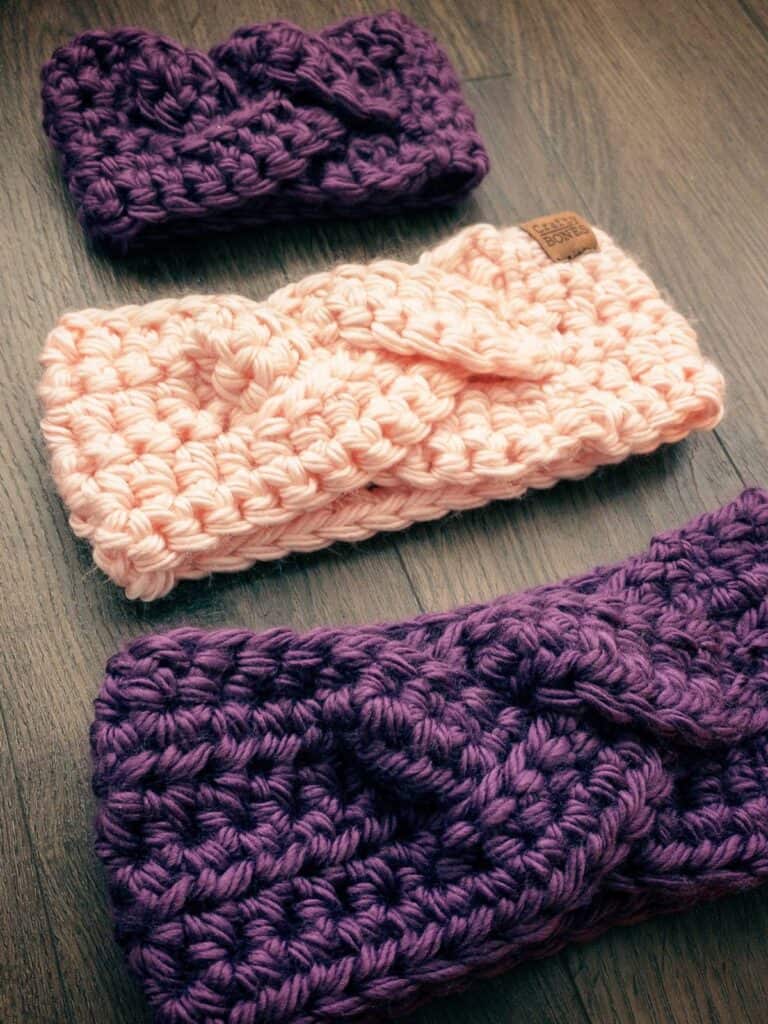
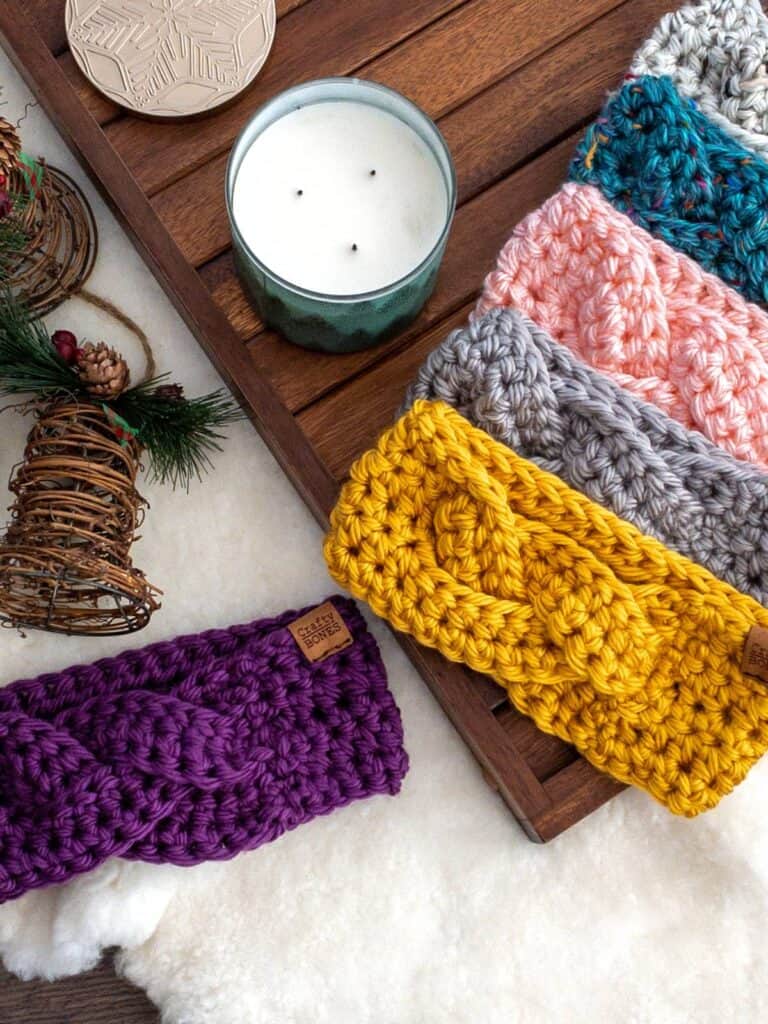
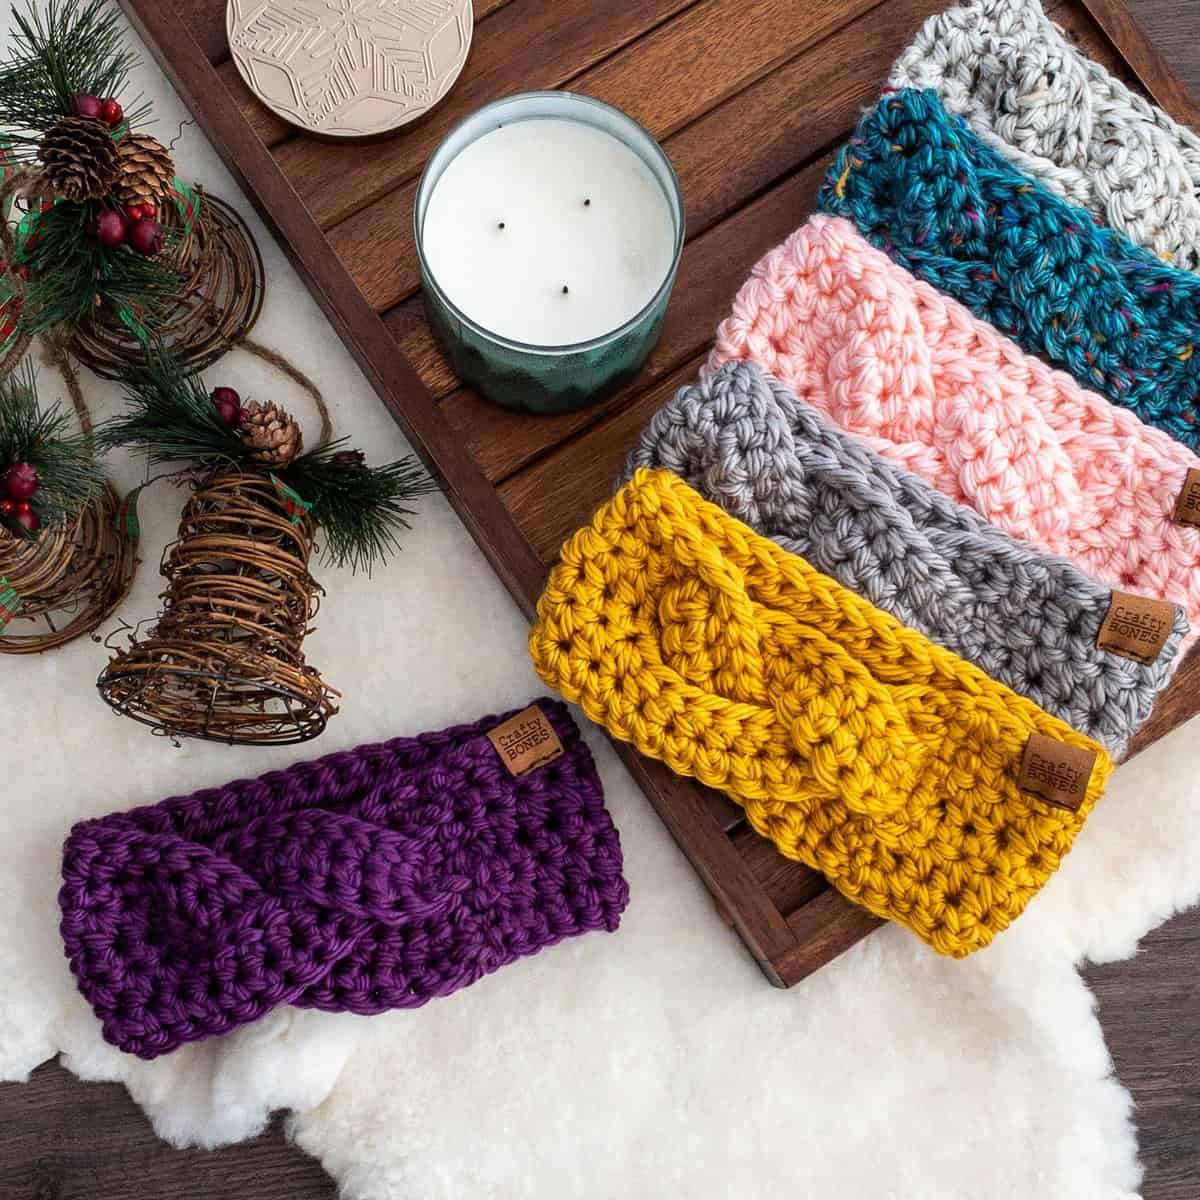
This braided ear warmer crochet pattern comes in multiple sizes and is perfect for adding a cozy layer to your winter outfits. In this post, I’ll walk you through the steps of creating this chunky, braided design.
If you’re looking for a distraction-free crochet session, I’ve got you covered! While you can enjoy this free version right here, you can also grab the ad-free, printer-friendly PDF over on Ravelry. It’s perfect for printing out and taking on the go!
Materials Needed:
Abbreviations in US Terms
CH – Chain
FHDC – Foundation Half Double Crochet
FSC – Foundation Single Crochet
HDC – Half Double Crochet
REP – Repeat
SC – Single Crochet
SK – Skip
ST (STS) – Stitch(es)
Gauge for Crochet Ear Warmers
In order to achieve the gauge you may need to size up or down on your crochet hook.
If you tend to crochet on the tighter side you would go up a hook size, and if you crochet on the looser side you may need to size down a hook size.
Smaller Sizes
2″ (5cm) square =
3 rows (hdc, sc, hdc) x 3 sts
Larger Sizes
2″ (5cm) square =
2.5 row (hdc, hdc, hdc) x 3 sts
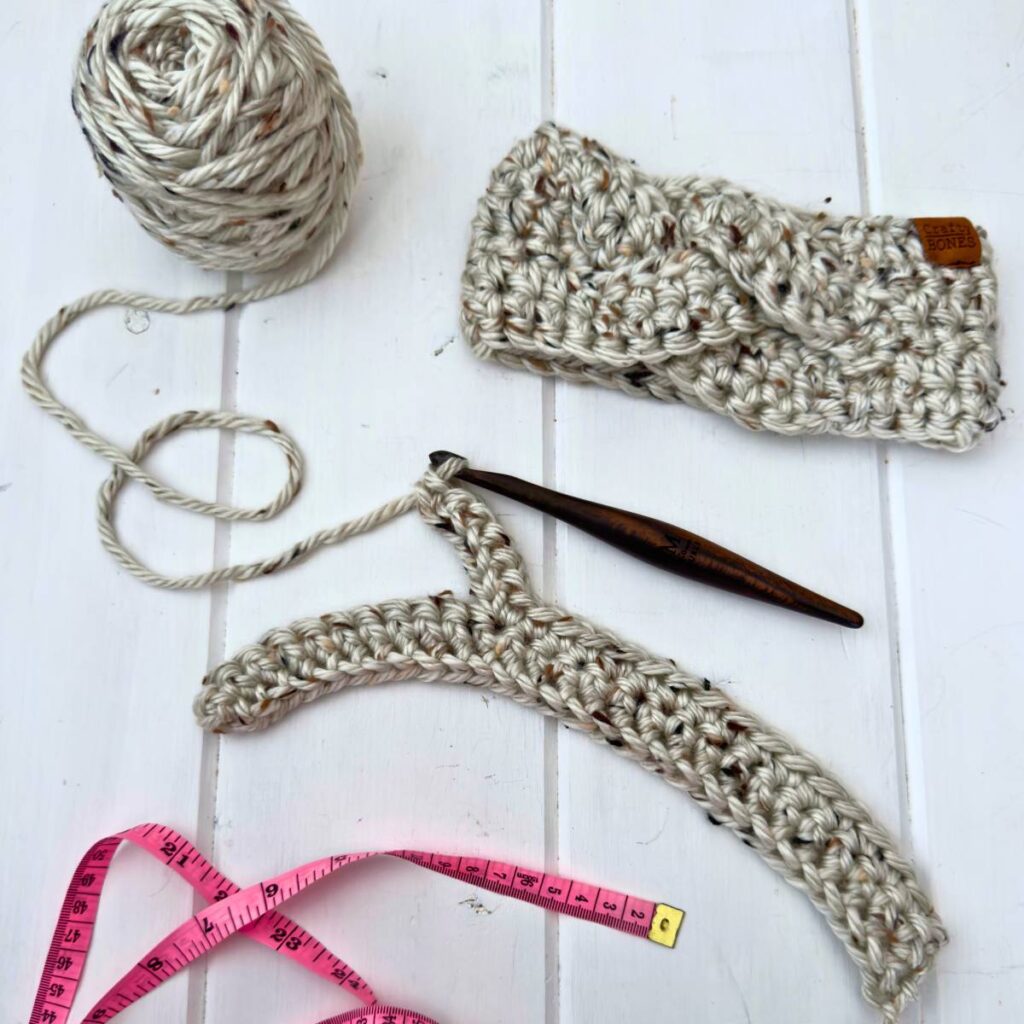
How to make a Foundation Single Crochet
Follow these steps to make a foundation single crochet stitch.
- Start by chaining 2.
- Insert your hook into the first chain/2nd chain from the hook. Yarn over and pull up a loop. You should have 2 loops on your hook.
- First thing we will do is create the chain part of the stitch: To do so Yarn over and pull through only the first loop on the hook.
- Next we will work the SC part of the stitch: Yarn over and pull through both loops on your hook.
- To create the second single crochet stitch, yarn over and insert hook into the “chain part of the stitch” (making sure to go through both loops you created in Step 3), Yarn over and pull up a loop. *the chain part of the stitch is the two loops that create a V on the underside of the previous FSC.
- Yarn over and pull through the first loop on the hook.
- Yarn over and pull through both loops on hook to complete your next single crochet stitch.
- Repeat steps 5-7 until you have your desired number of FSC’s.
How to make a Foundation Half Double Crochet
Follow these steps to make a foundation half double crochet stitch.
- Start by chaining 2.
- Yarn over, and then insert your hook into the first chain/2nd chain from the hook. Yarn over and pull up a loop. You should have 3 loops on your hook.
- First thing we will do is create the chain part of the stitch: To do so Yarn over and pull up through the first loop on the hook.
- Next we will work the HDC part of the stitch: Yarn over and pull through all 3 loops on your hook.
- To create the second half double crochet stitch, yarn over and insert hook into the “chain part of the stitch” (making sure to go through both loops you created in Step 3), Yarn over and pull up a loop. *the chain part of the stitch is the two loops that create a V on the underside of the previous FHDC.
- Yarn over and pull through the first loop on the hook.
- Yarn over and pull through all 3 loops on hook to complete your next half double crochet stitch.
- Repeat steps 5-7 until you have your desired number of FHDC’s.
Crochet Ear Warmer Patterns: Baby, Toddler, Child, Teen, Adult (Small, Medium & Large)
Note: 1. The turning chain counts as the first stitch in the row. 2. The FSC & FHDC when worked following the sts will be work into the same st from the previous row as you worked your last st into.
Pattern for Baby Size Ear Warmer
Row 1: Fsc 28, turn.
Row 2: Ch 1, sc 27 across, turn.
Row 3: Ch 1, sc 16, working into the base of the last st fsc 11, turn.
Row 4: Ch 1, sc 27 across, turn.
Row 5 – Row 6: Repeat row 3 and 4, tie off leaving at least a 12” tail for seaming.
Get the Ad-Free Braided Ear Warmer PDF
Ready for a seamless crochet experience? Download the ad-free PDF of the Braided Crochet Ear Warmer pattern today and start creating your cozy accessory without distractions!
Pattern for Toddler Size Ear Warmer
Row 1: Fsc 30, turn.
Row 2: Ch 1, sc 29 across, turn.
Row 3: Ch 1, sc 18, working into the base of the last st fsc 11, turn.
Row 4: Ch 1, sc 29 across, turn.
Row 5 – Row 6: Repeat row 3 and 4, tie off leaving at least a 12” tail for seaming.
Pattern for Child Size Ear Warmer
Row 1: Fhdc 32, turn.
Row 2: Ch 1, sc 31 across, turn.
Row 3: Ch 2, hdc 20, working into the base of the last st fhdc 11, turn.
Row 4: Ch1, sc 31 across, turn.
Row 5 – Row 6: Repeat row 3 and 4, tie off leaving at least a 12” tail for seaming.
Pattern for Teen Size Ear Warmer
Row 1: Fhdc 34, turn.
Row 2: Ch 2, hdc 33 across, turn.
Row 3: Ch 2, hdc 22, working into the base of the last st fhdc 11, turn.
Row 4: Ch 2, hdc 33 across, turn.
Row 5 – Row 6: Repeat row 3 and 4, tie off leaving at least a 12” tail for seaming.
Pattern for Adult Size Ear Warmer
Small (Medium, Large)
Row 1: Fhdc 36 (38, 40), turn.
Row 2: Ch 2, hdc 35 (37, 39) across, turn.
Row 3: Ch 2, hdc 24 (27, 29), Working into the base of the last st work 11 fhdc, turn.
Row 4: Ch 2, hdc 35 (37, 39) across, turn.
Row 5 – Row 6: Repeat row 3 and 4, tie off leaving at least a 12” tail for seaming.
How to Seam up the Crochet Ear Warmer
Once you are all done with the crochet part of the pattern you will braid the three tails together. Just like the pictures. The middle tail should end up back at the middle, the top at the bottom and the bottom at the top.
Using a tapestry hook and your yarn tail stitch the three braided tails to the flat edge of the other short side. I would recommend using a mattress stitch to achieve a smooth seam. Once finished tie off and weave in your ends.
 Step 1: Begin by laying out your 3 crocheted sections flat .
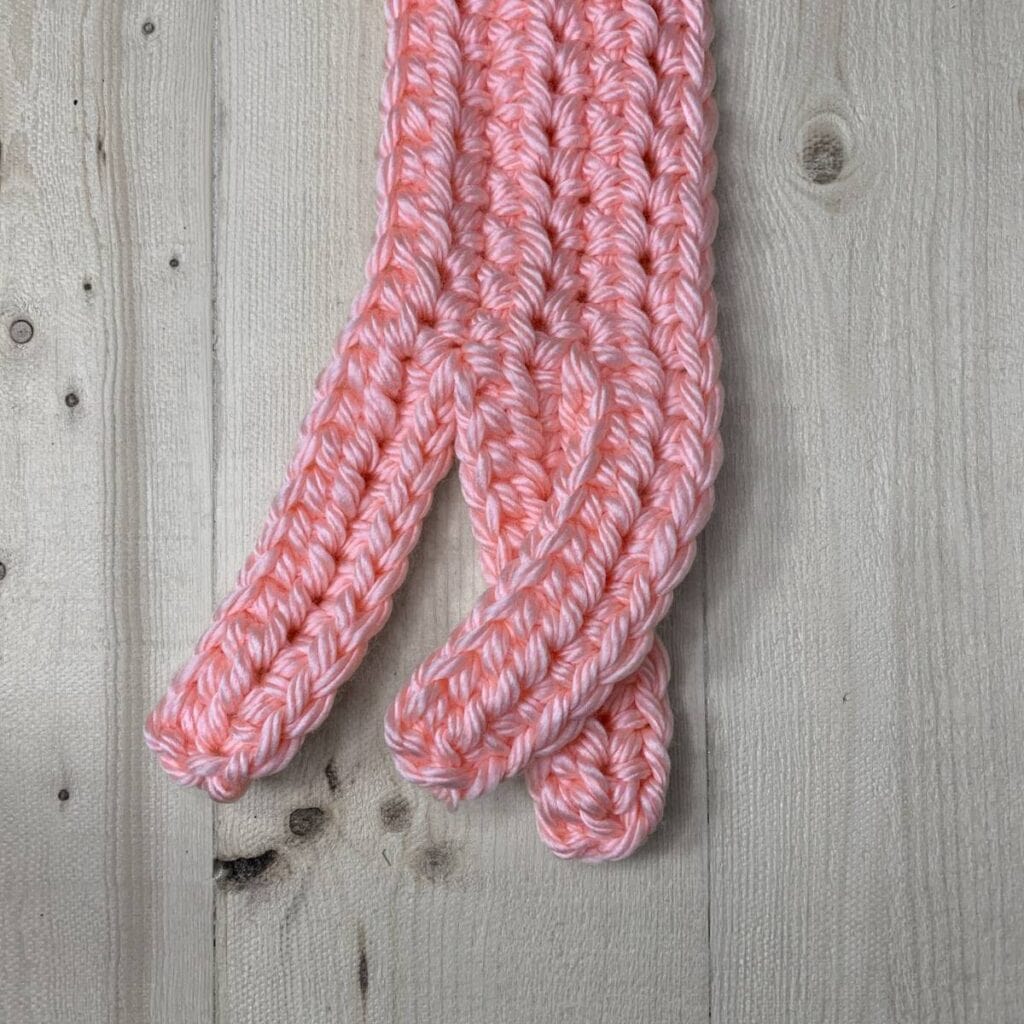 Step 2: Take the right crocheted section and cross it over the middle.
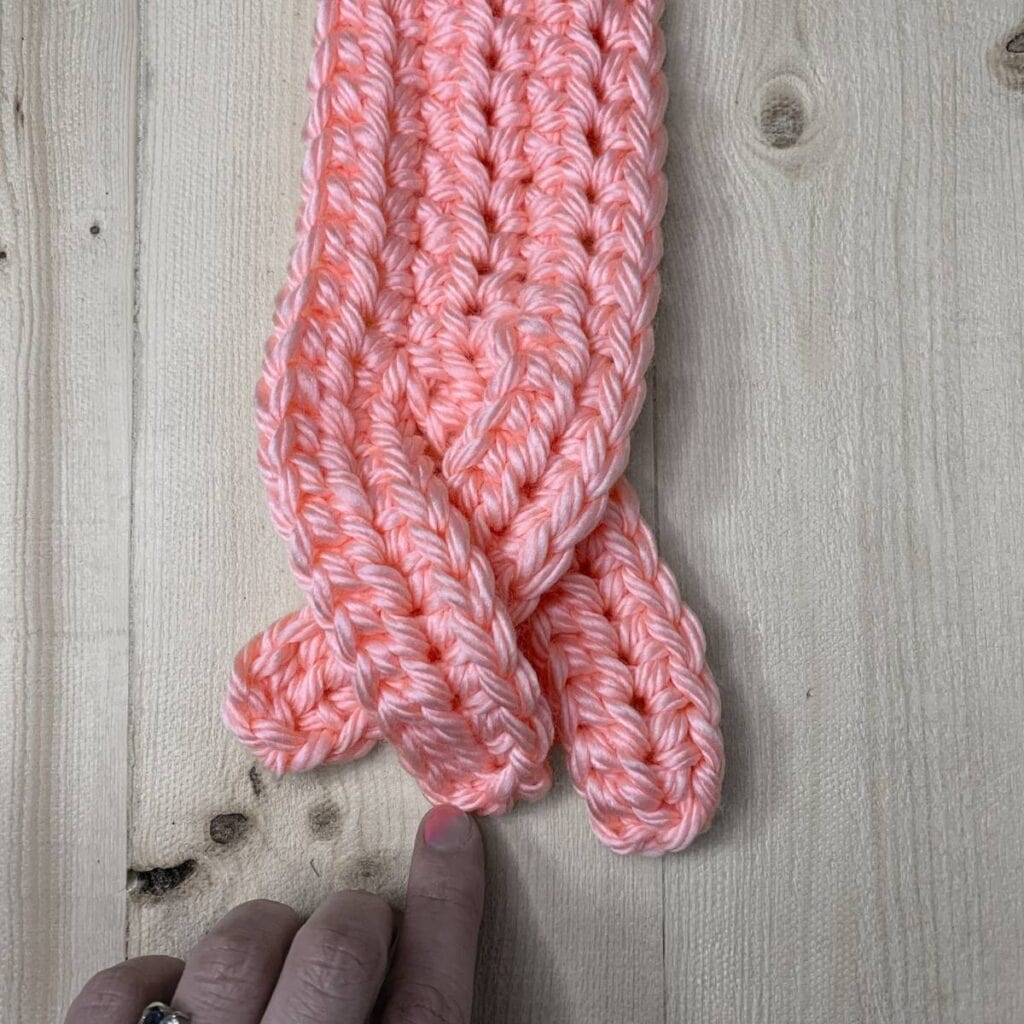 Step 3: Now cross the left crocheted section over to the middle to continue.
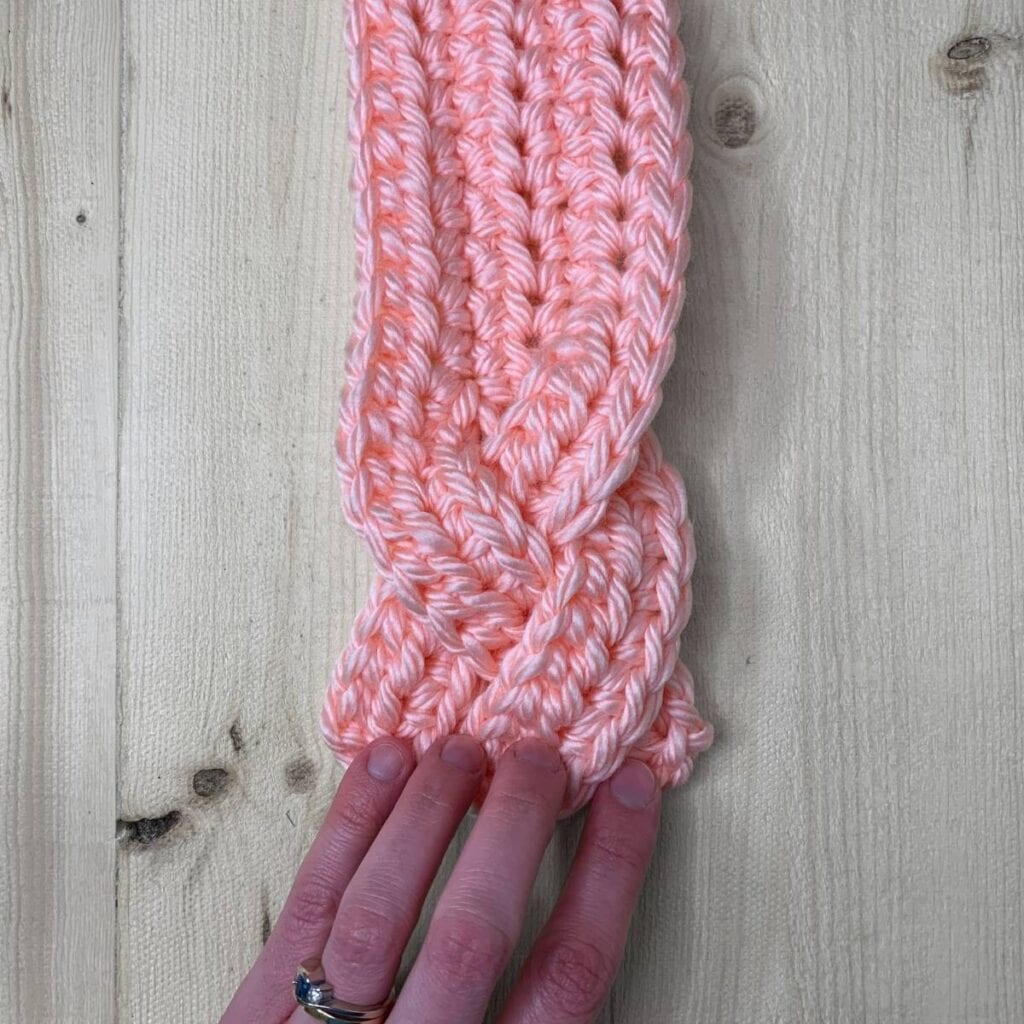 Step 4: To finish the braid cross the right crocheted section over to the middle.
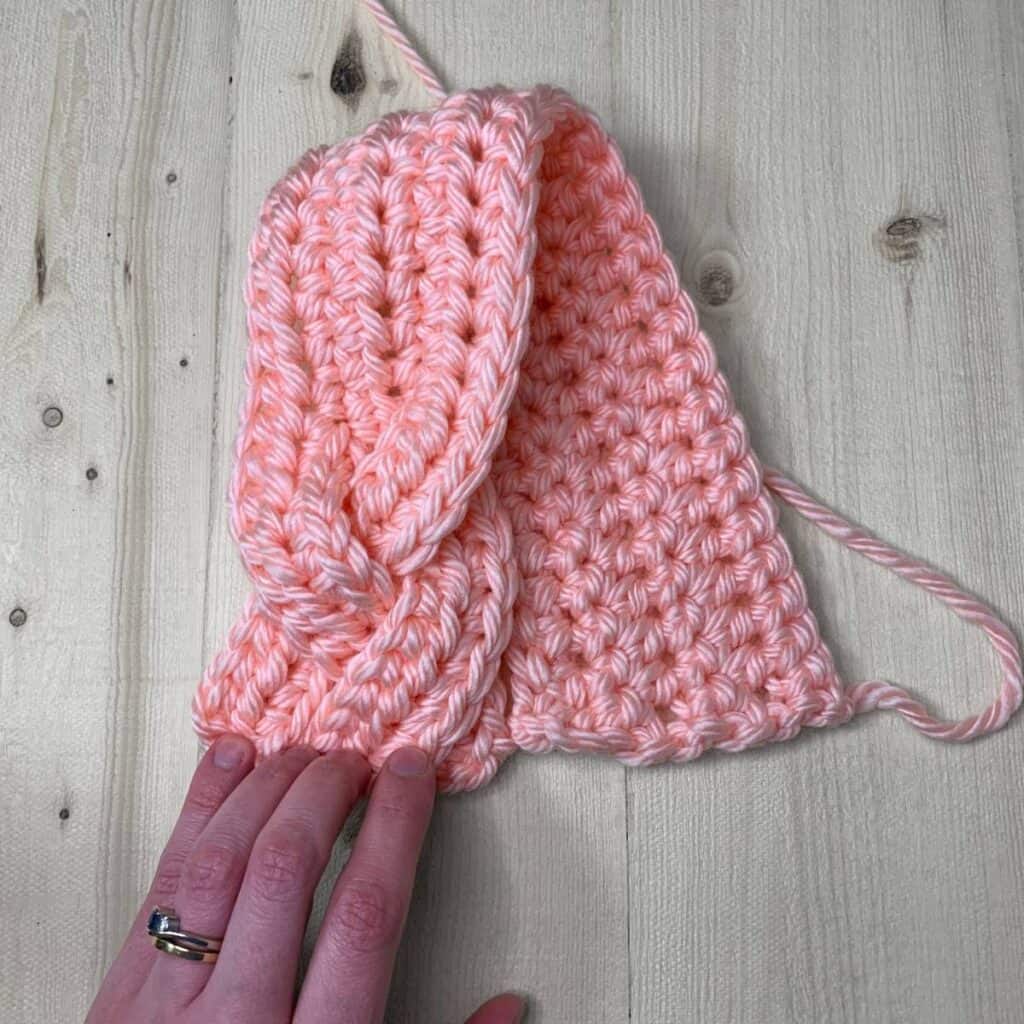 Step 5: Fold the ear warmer in half being careful to keep the braided part intact.
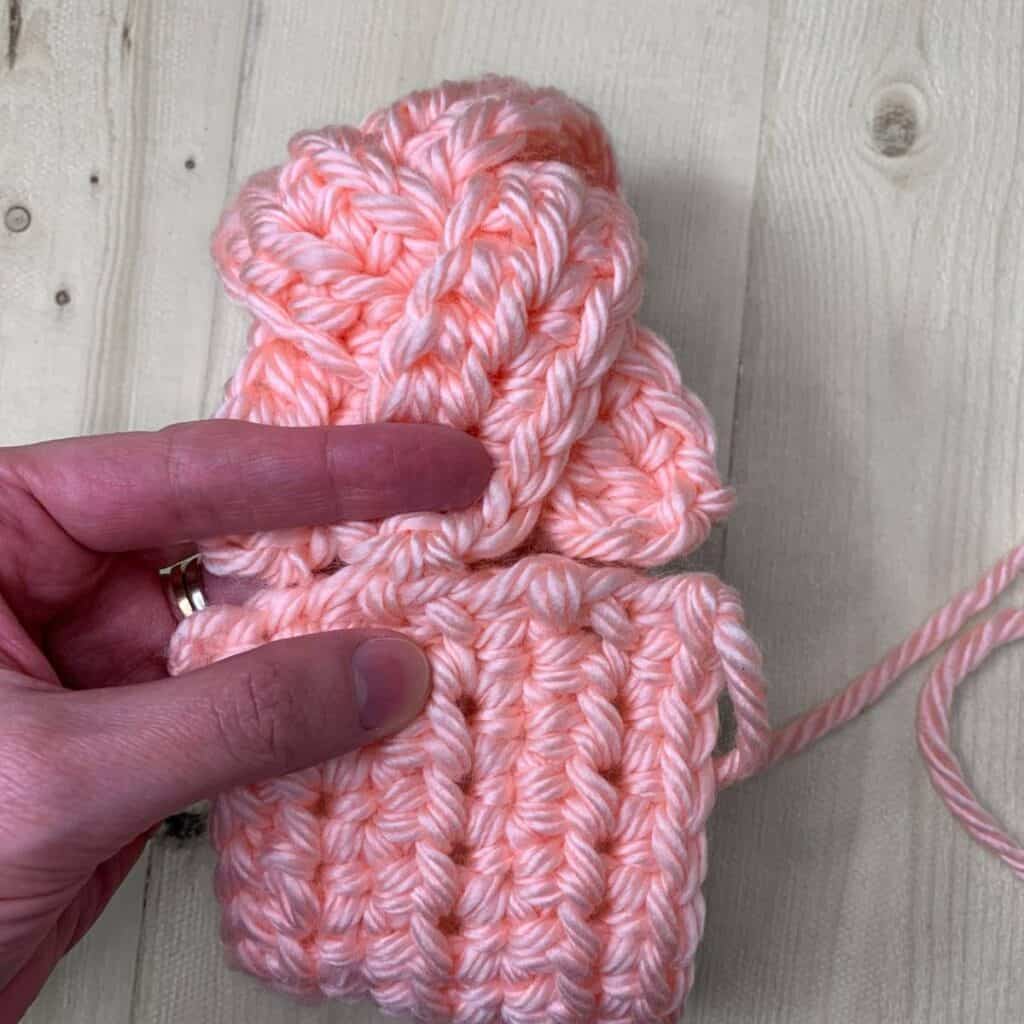 Step 6: Seam the ends together with the tail and mattress stitch.
Crocheting your own ear warmer is not only a rewarding experience but also a great way to customize your winter accessories. The braided crochet ear warmer adds texture and warmth, making it a versatile piece that pairs well with any winter wardrobe.
Share with Our Crochet Community:
We love seeing your creativity come to life. Make sure to share your finished ear warmers with us on Instagram by tagging @crafty.bones and using #MakewithCraftyBones and follow to stay tuned for more crochet patterns and tutorials!
Cozy Braided Earwarmer
Make your own stylish crochet ear warmer today!
This is an original pattern by Crafty Bones ©2021. Distribution of this document in whole or in part in any way is not allowed. You may sell finished work with this pattern but please kindly include pattern credit to Leanna Haughian of Crafty Bones or link back to crafty-bones.com
I would love to see your finished items, tag me in any work on social media
@Crafty.bones or use the hashtag #makewithcraftybones
Subscribe to stay up to date on the latest patterns