The Darling Pumpkin Crochet Pattern
Some links in this post are affiliate links, so I may earn a small commission if you make a purchase. It’s a great way to support Crafty Bones, and it doesn’t cost you anything extra! You can find more details in our Privacy Policy.
Quick & Easy Pumpkin Crochet Pattern in 3 Sizes
Looking to create a beautiful pumpkin crochet pattern? This quick and textured crochet pumpkin is perfect for fall décor. It’s simple to make and offers a sophisticated, seasonal look.
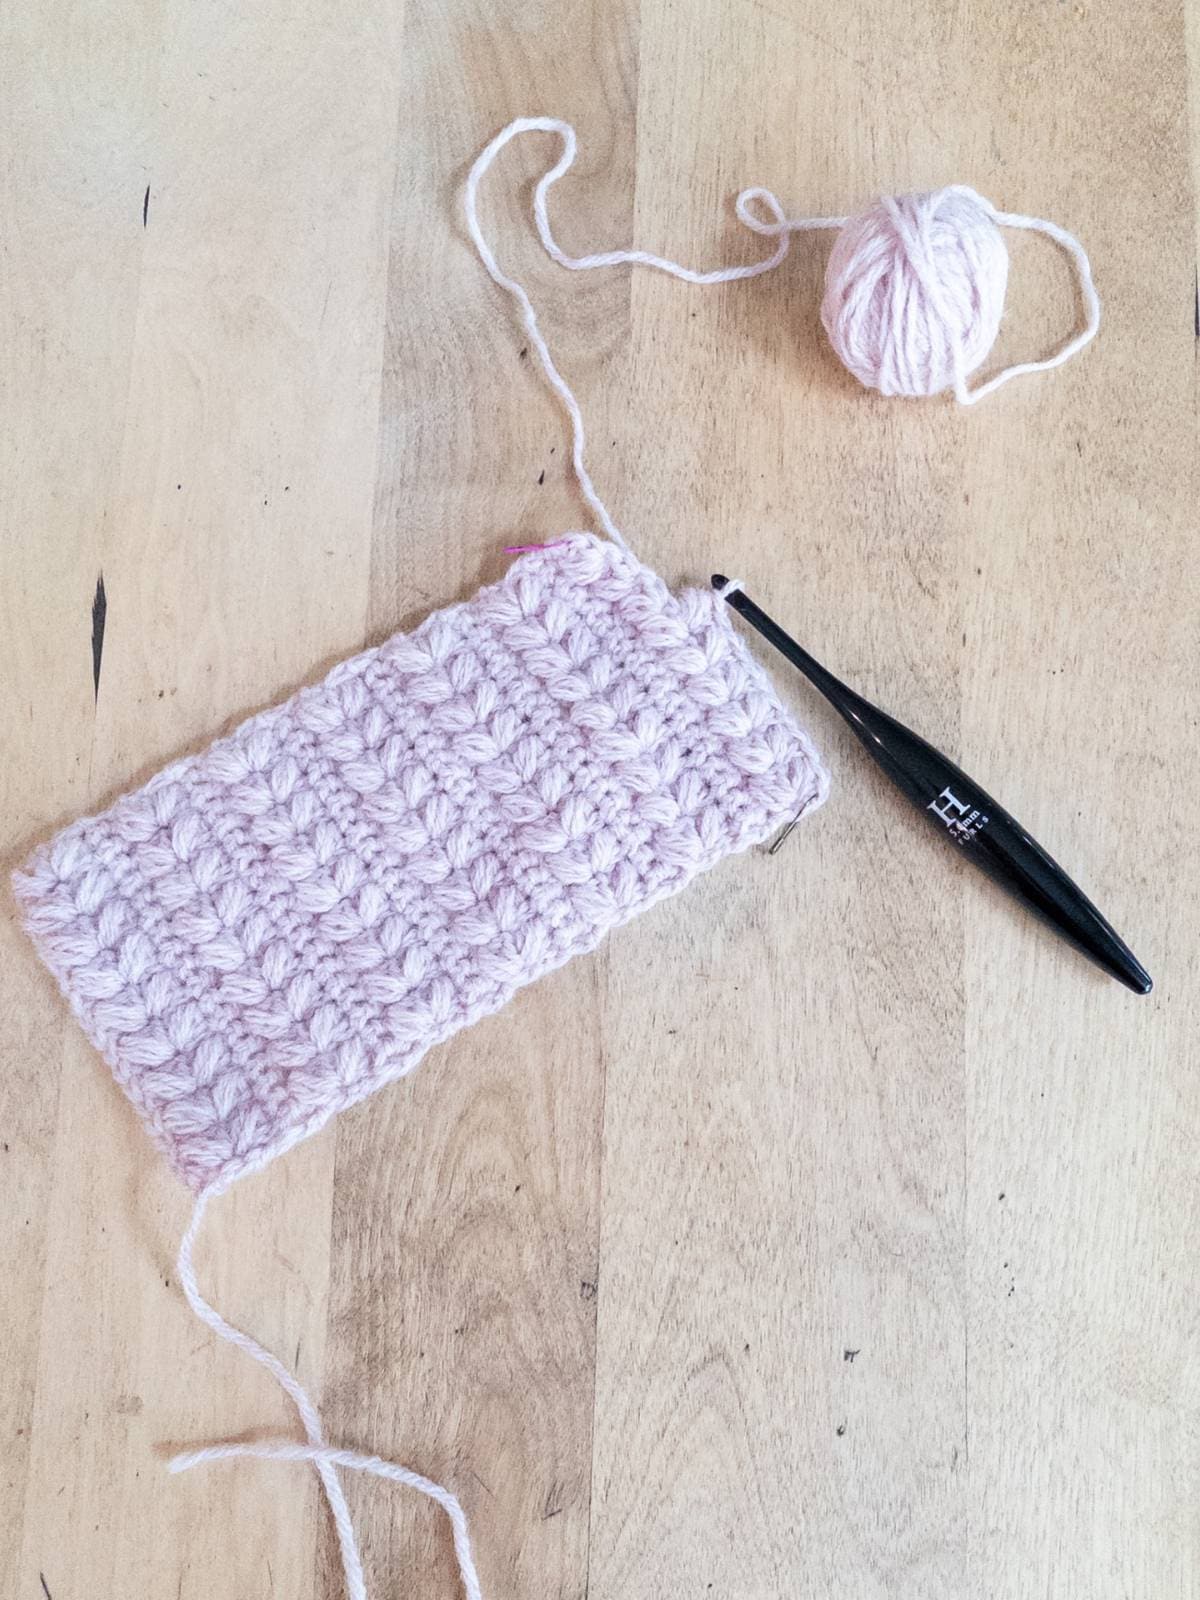
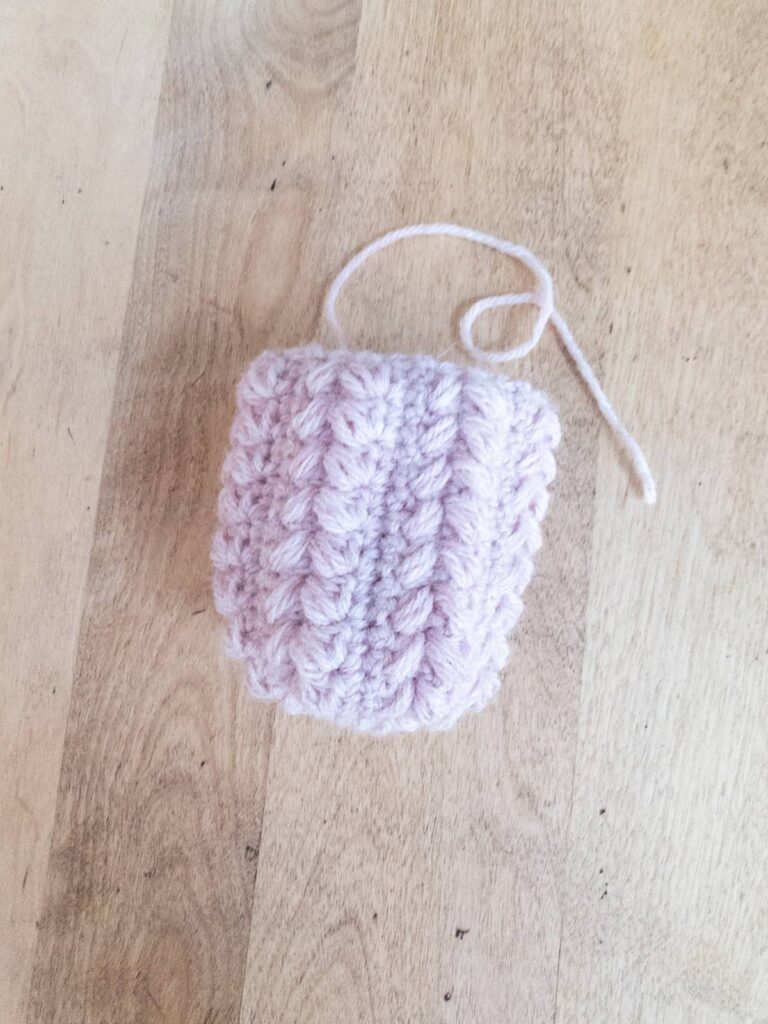
This adorable crochet pumpkin starts with a basic rectangle, making it super easy to create. After you’ve crocheted the rectangle, just seam the edges together to form a circle. Then, all that’s left is to cinch the top and bottom, giving it that perfect, classic pumpkin shape. It’s a fun and simple project that’s great for adding a handmade touch to your fall décor!

This is the free version of The Darling Pumpkins crochet pattern. If you’d like an ad-free, printer-friendly PDF, you can purchase it on Ravelry. Enjoy a seamless, easy-to-read format perfect for crafting on the go!
Customizing Your Crochet Pumpkin
The beauty of this crochet pumpkin pattern is how easily you can personalize it! Whether you want a mini pumpkin to accent your fall décor or a large, eye-catching centerpiece, you can adjust the size to match your style.
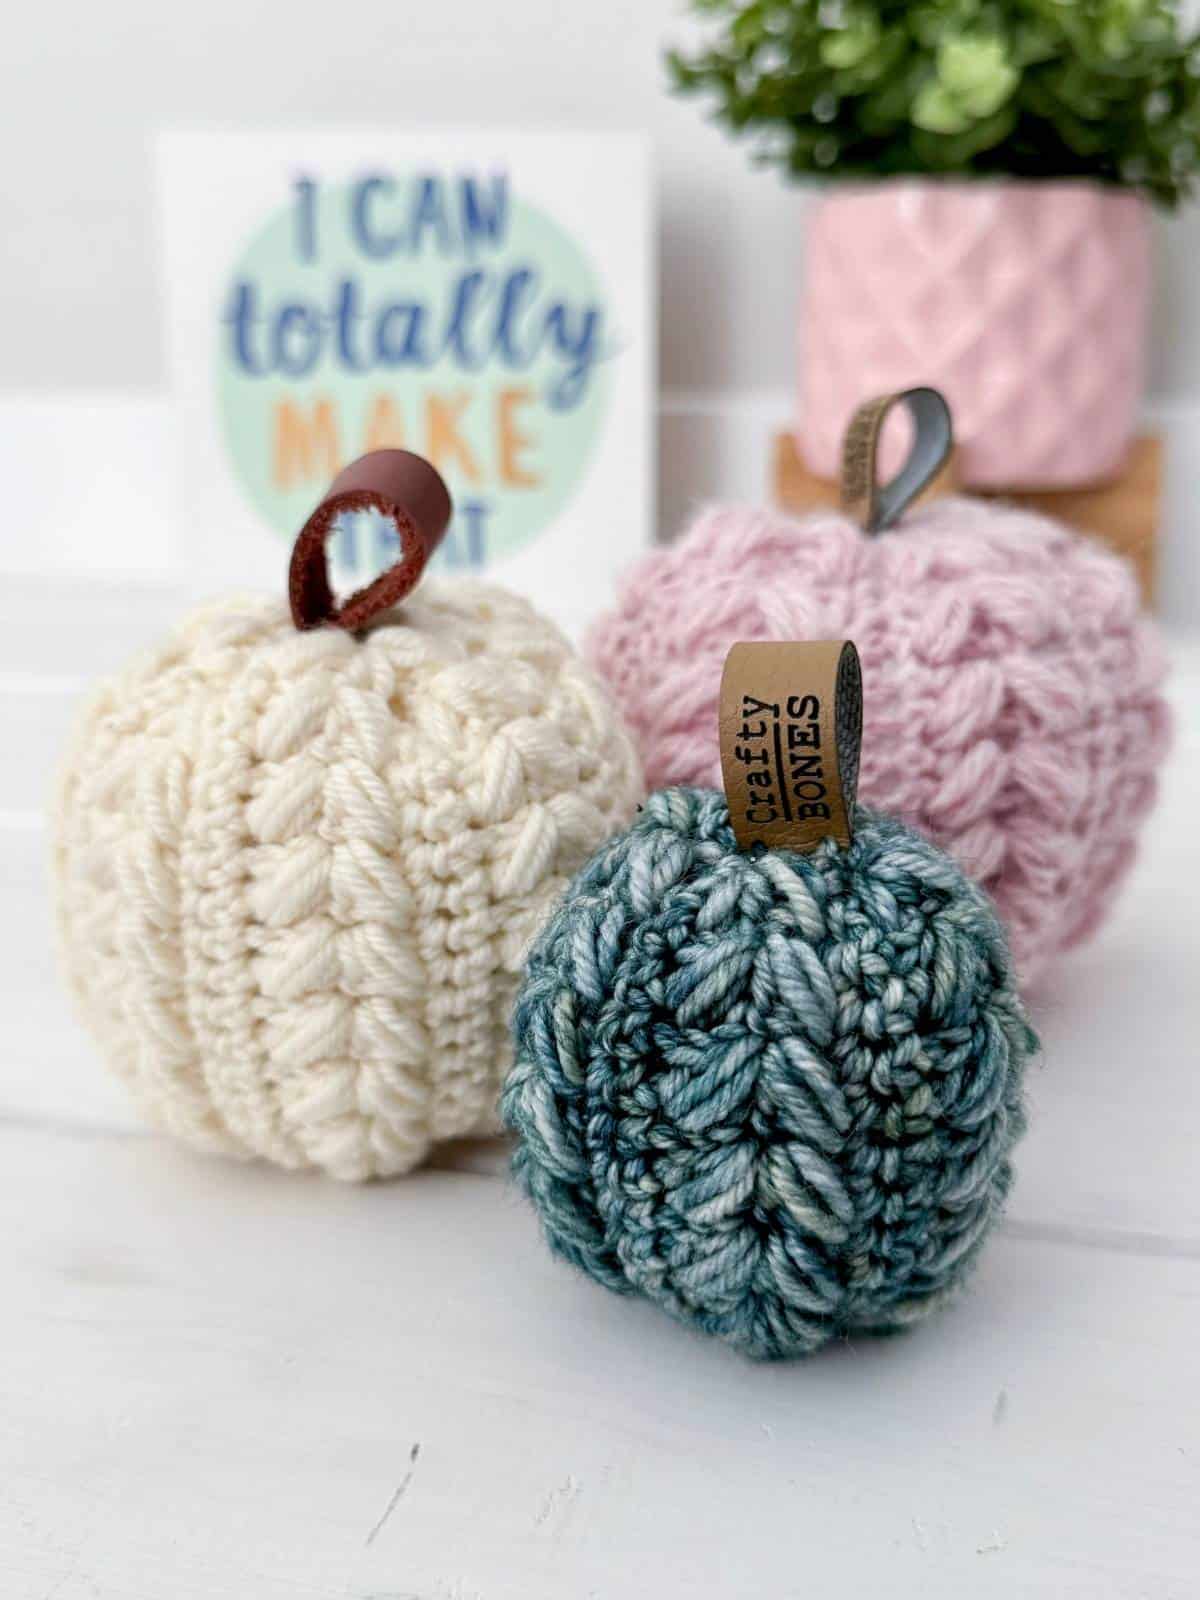
Add a Stem or Keep it Minimal
For a classic pumpkin look, you can add a stem using your favorite yarn or even a piece of leather or wood for a unique touch. If you prefer a sleek, modern aesthetic, simply leave it stem-free for a minimalist, textured pumpkin that fits perfectly into any décor!
Materials Needed
- 5.0mm (H-8) Crochet Hook
- Size 4 / Worsted Yarn Weight
- Pattern used – Lion Brand Wool Ease
- Stitch Markers (Optional)
- Stuffing
- Leather Tag used for Stem (Optional)
- Scissors
- Tapestry Needle
Crochet Stitch Abbreviations
in US Terms
ch – Chain
cont. – Continued
fsc – Foundation Single Crochet
hdc – Half Double Crochet
puff – Puff Stitch described in Instructions
sc – Single Crochet
sk/skp – Skip/Skipped
st/sts – Stitch/Stitches
What You Need to Know
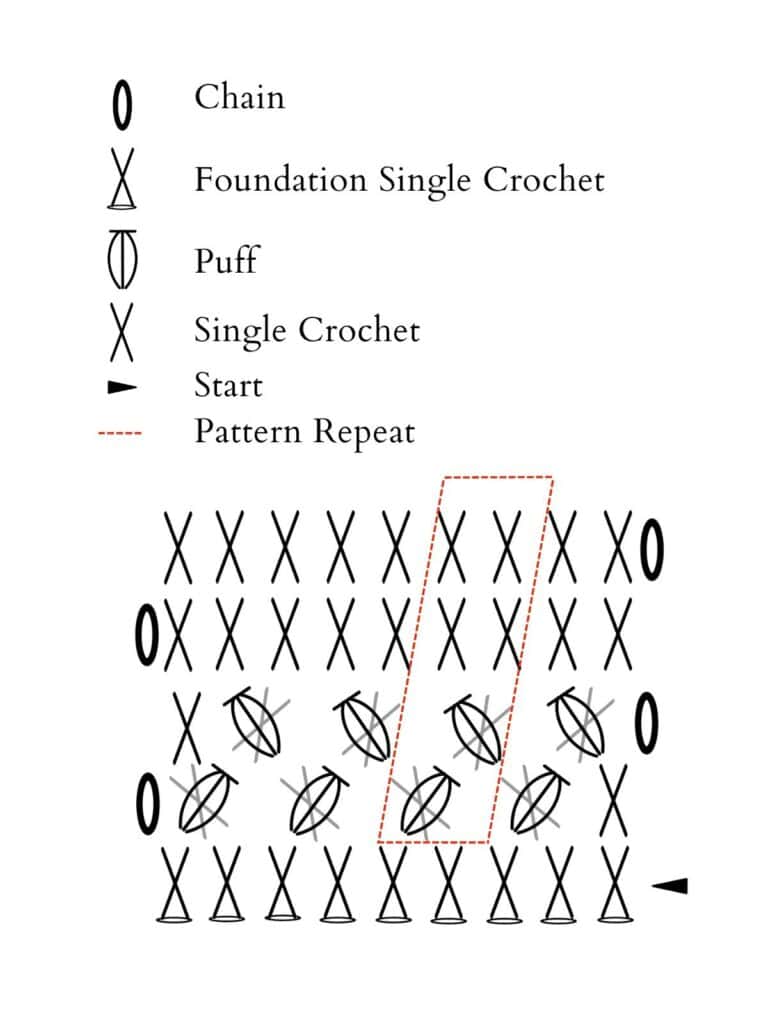
Puff Stitch
To make this stitch you will: Yarn over and insert the hook into the stitch where you are creating your puff stitch. Yarn over and draw through. There will be three loops on the hook. Yarn over, insert your hook into the same stitch as the first step. Yarn over and draw through. There will be 5 loops on your hook now. Yarn over, insert your hook into the same stitch a third time. Yarn over and draw through. There will now be 7 loops on the hook for a 3 hdc puff stitch. Yarn over and pull through all loops on the hook.
Seaming
Once you have finished off the Rectangle Panel you will fold it in half to join the two short ends together. Using a mattress stitch you will join the sc from the last row to the base of the fsc of the first row. This will create a tube. Once finished the mattress stitch fasten off. Using the remainder of the tail, loop through the outside of the stitches along the top of the pumpkin. Once you have completely gone around the circle cinch in and tie off. Stuff the pumpkin with the filling of your choice. Using the tail on the other of the tube and repeat the same process for cinching in the top of the pumpkin. Add in a faux stem if desired.
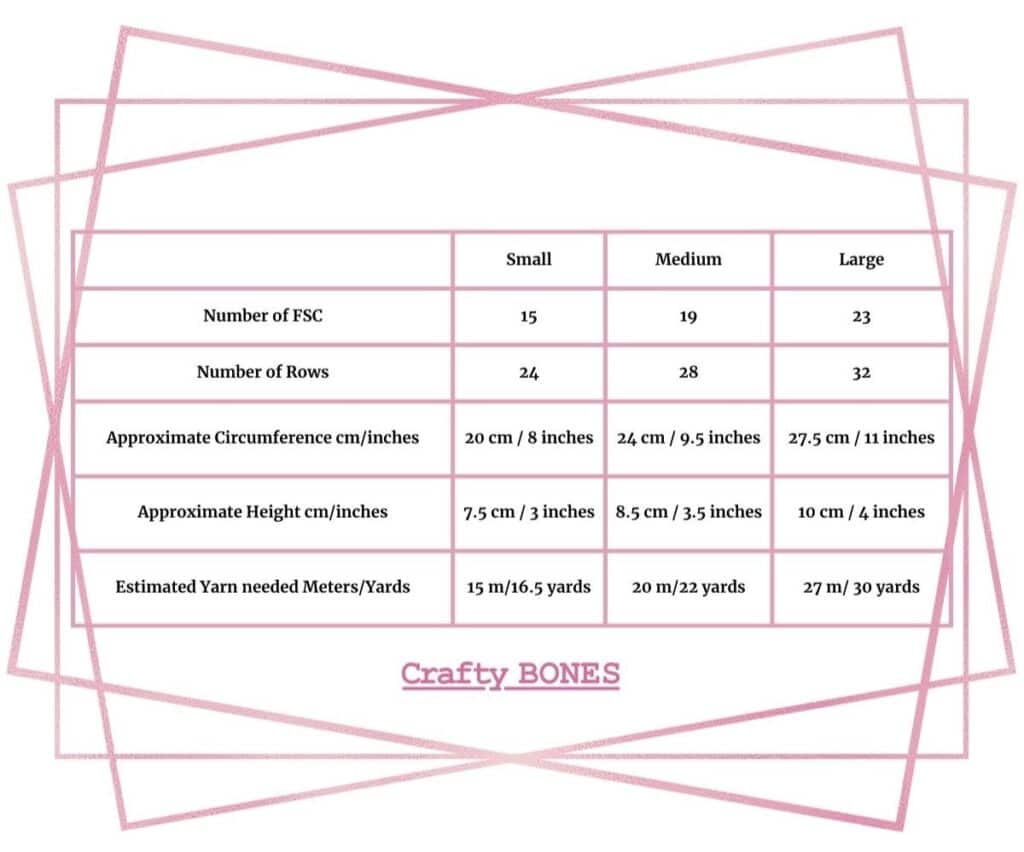
Sizing
This pumpkin pattern is intended to make mini sized pumpkins. You can easily adjust the size of the rectangle you make to create all different sizes of pumpkins. You can alter the width of the pumpkin up or down by increasing or decreasing the amount of times you repeat rows 4-7. To adjust the height you can increase or decrease the number of fsc in row 1, as long as it remains an odd number. You can also use this same pattern with a bulkier weight yarn and corresponding hook size for the weight.
Darling Pumpkin Crochet Pattern
Ch 1 does not count as a st for this pattern Small (Medium, Large).
- Leave a tail at the beginning of the fsc at least 12 inches long.
- Row 1: Work a fsc of 15 (19, 23), turn.
- Row 2 & 3: Ch 1, *sk 1, sc in next st, work puff st back into the skd st, repeat from * across, sc in last st, turn 15 (19, 23) sts.
- Row 4 & 5: Ch 1, sc across, turn 15 (19, 23) sts.
- Row 6 & 7: Ch 1, *sk 1, sc in next st, work puff st back into the skd st, repeat from * across, sc in last st, turn 15 (19, 23) sts.
- Row 8 to Row 23 (27, 31): Repeat rows 4 to 7.
- Row 24 (28, 32): Ch 1, sc across, tie off 15 (19, 23) sts.
- Fasten off, leaving a long enough tail for seaming (approximately 12” / 30cm).
Darling Pumpkins
Get the ad-free PDF version of the Darling Pumpkins crochet pattern today and start creating your own cozy pumpkins!